
Intellij IDEA工具下搭建SpringBoot入门程序使用maven
环境准备
- Intellij IDEA 2016.2
- maven 3.0.5
- SpringBoot 1.5.8
步骤
一、新建项目
file->new->project
创建项目选择maven如下图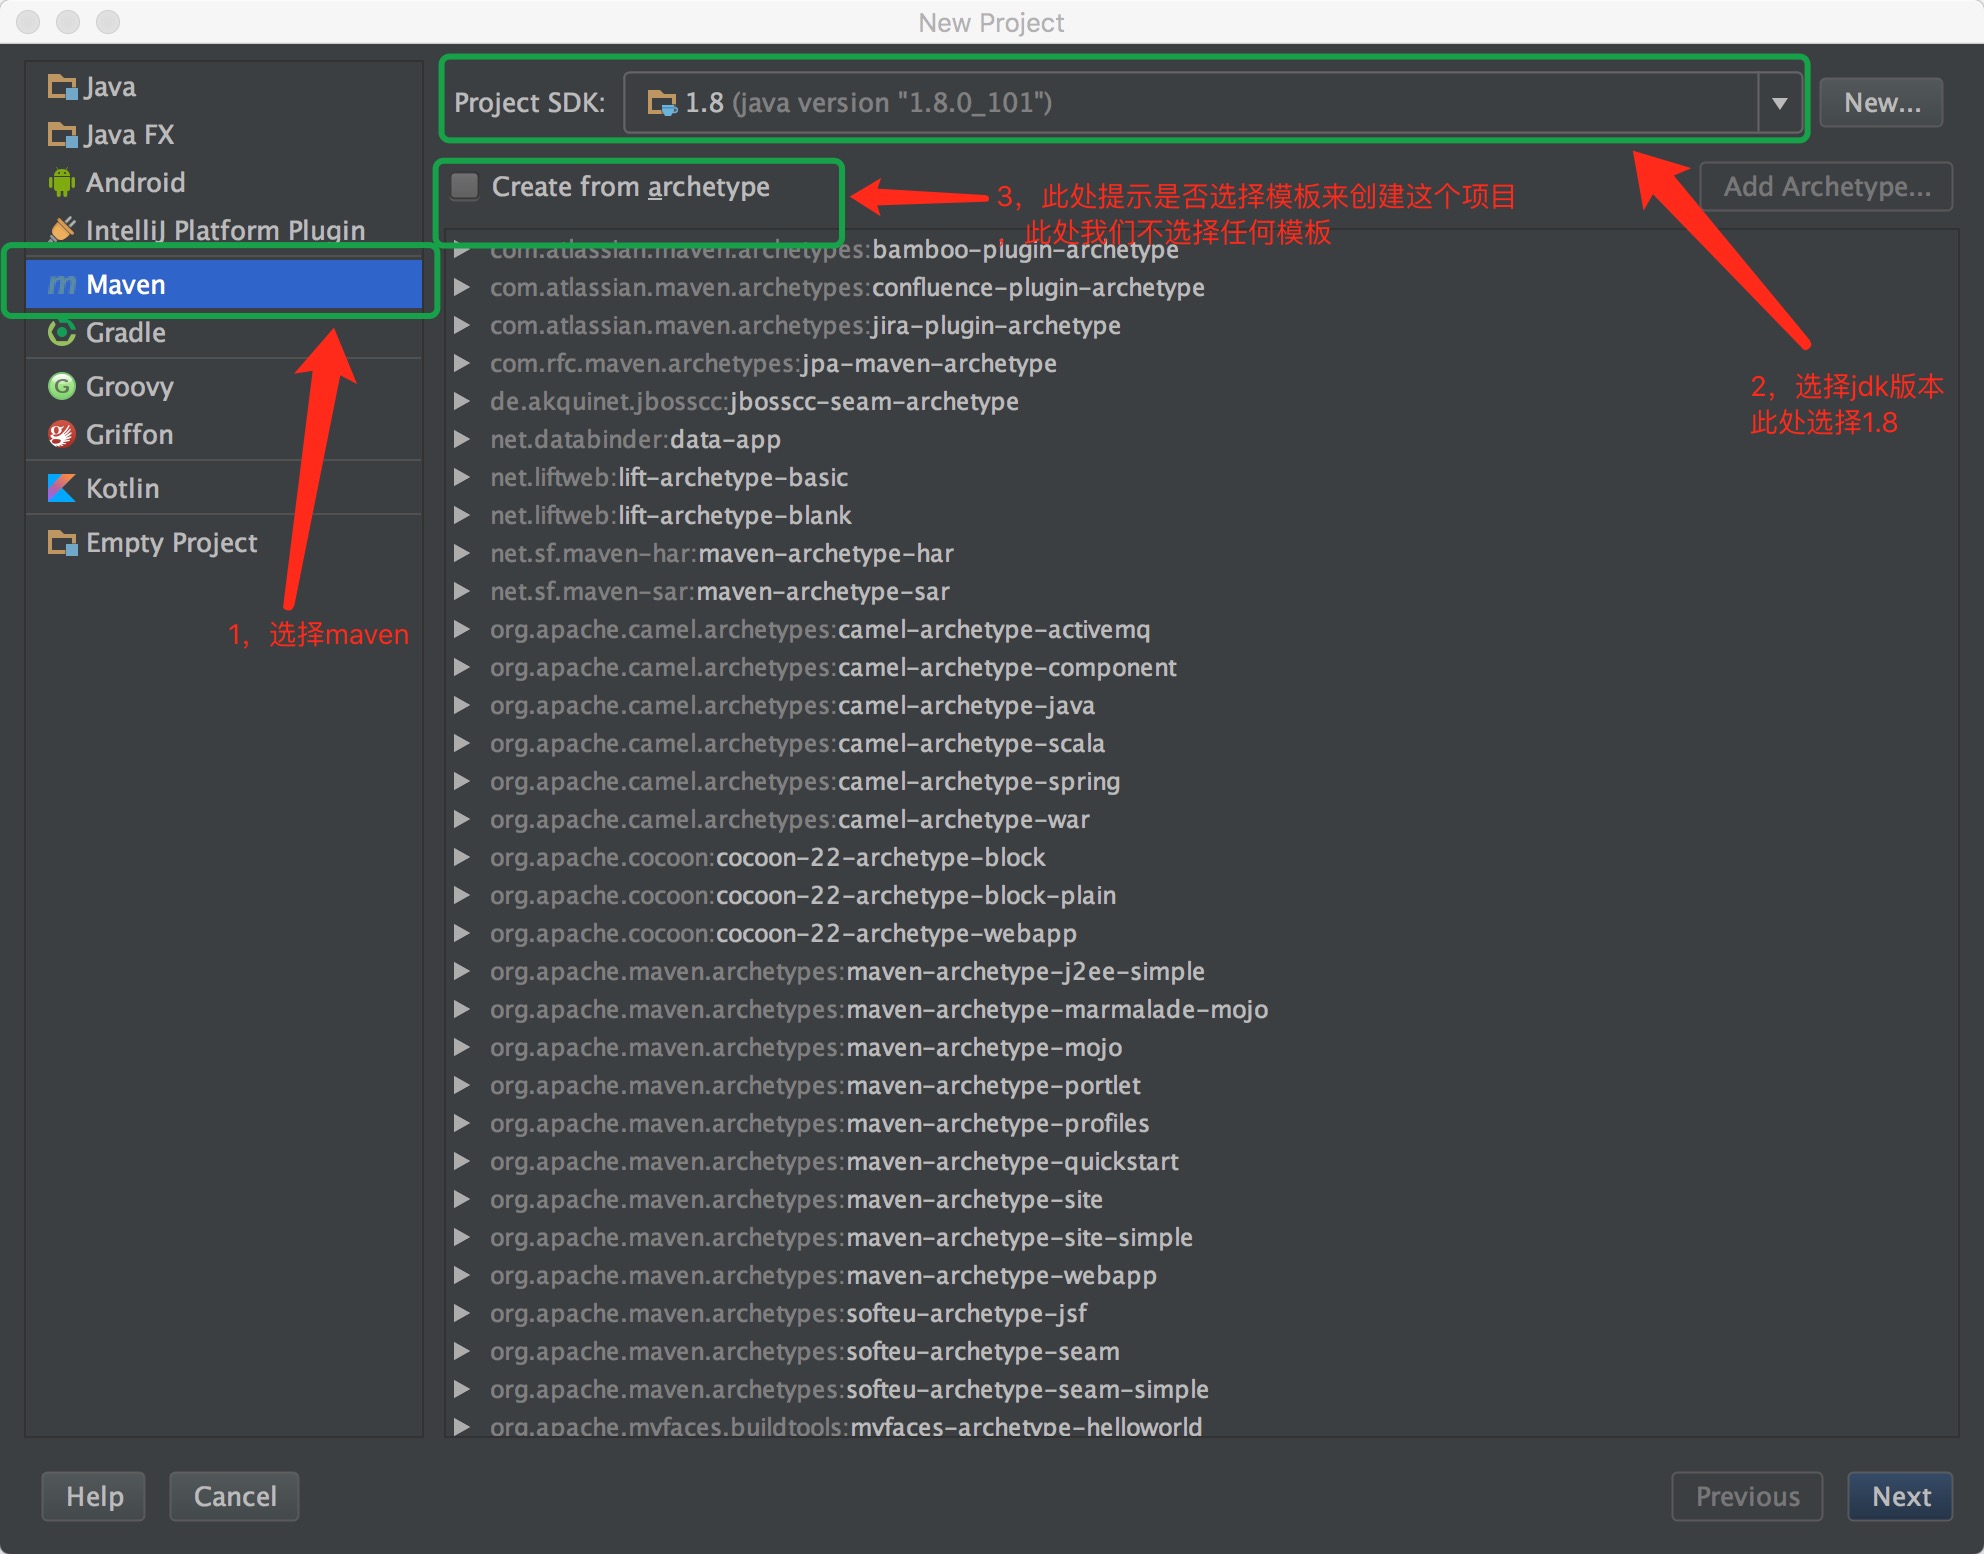
点击next
如图填入自己项目的信息,由于是创建的maven项目,所以此处填写maven需要的字段信息,具体见途中说明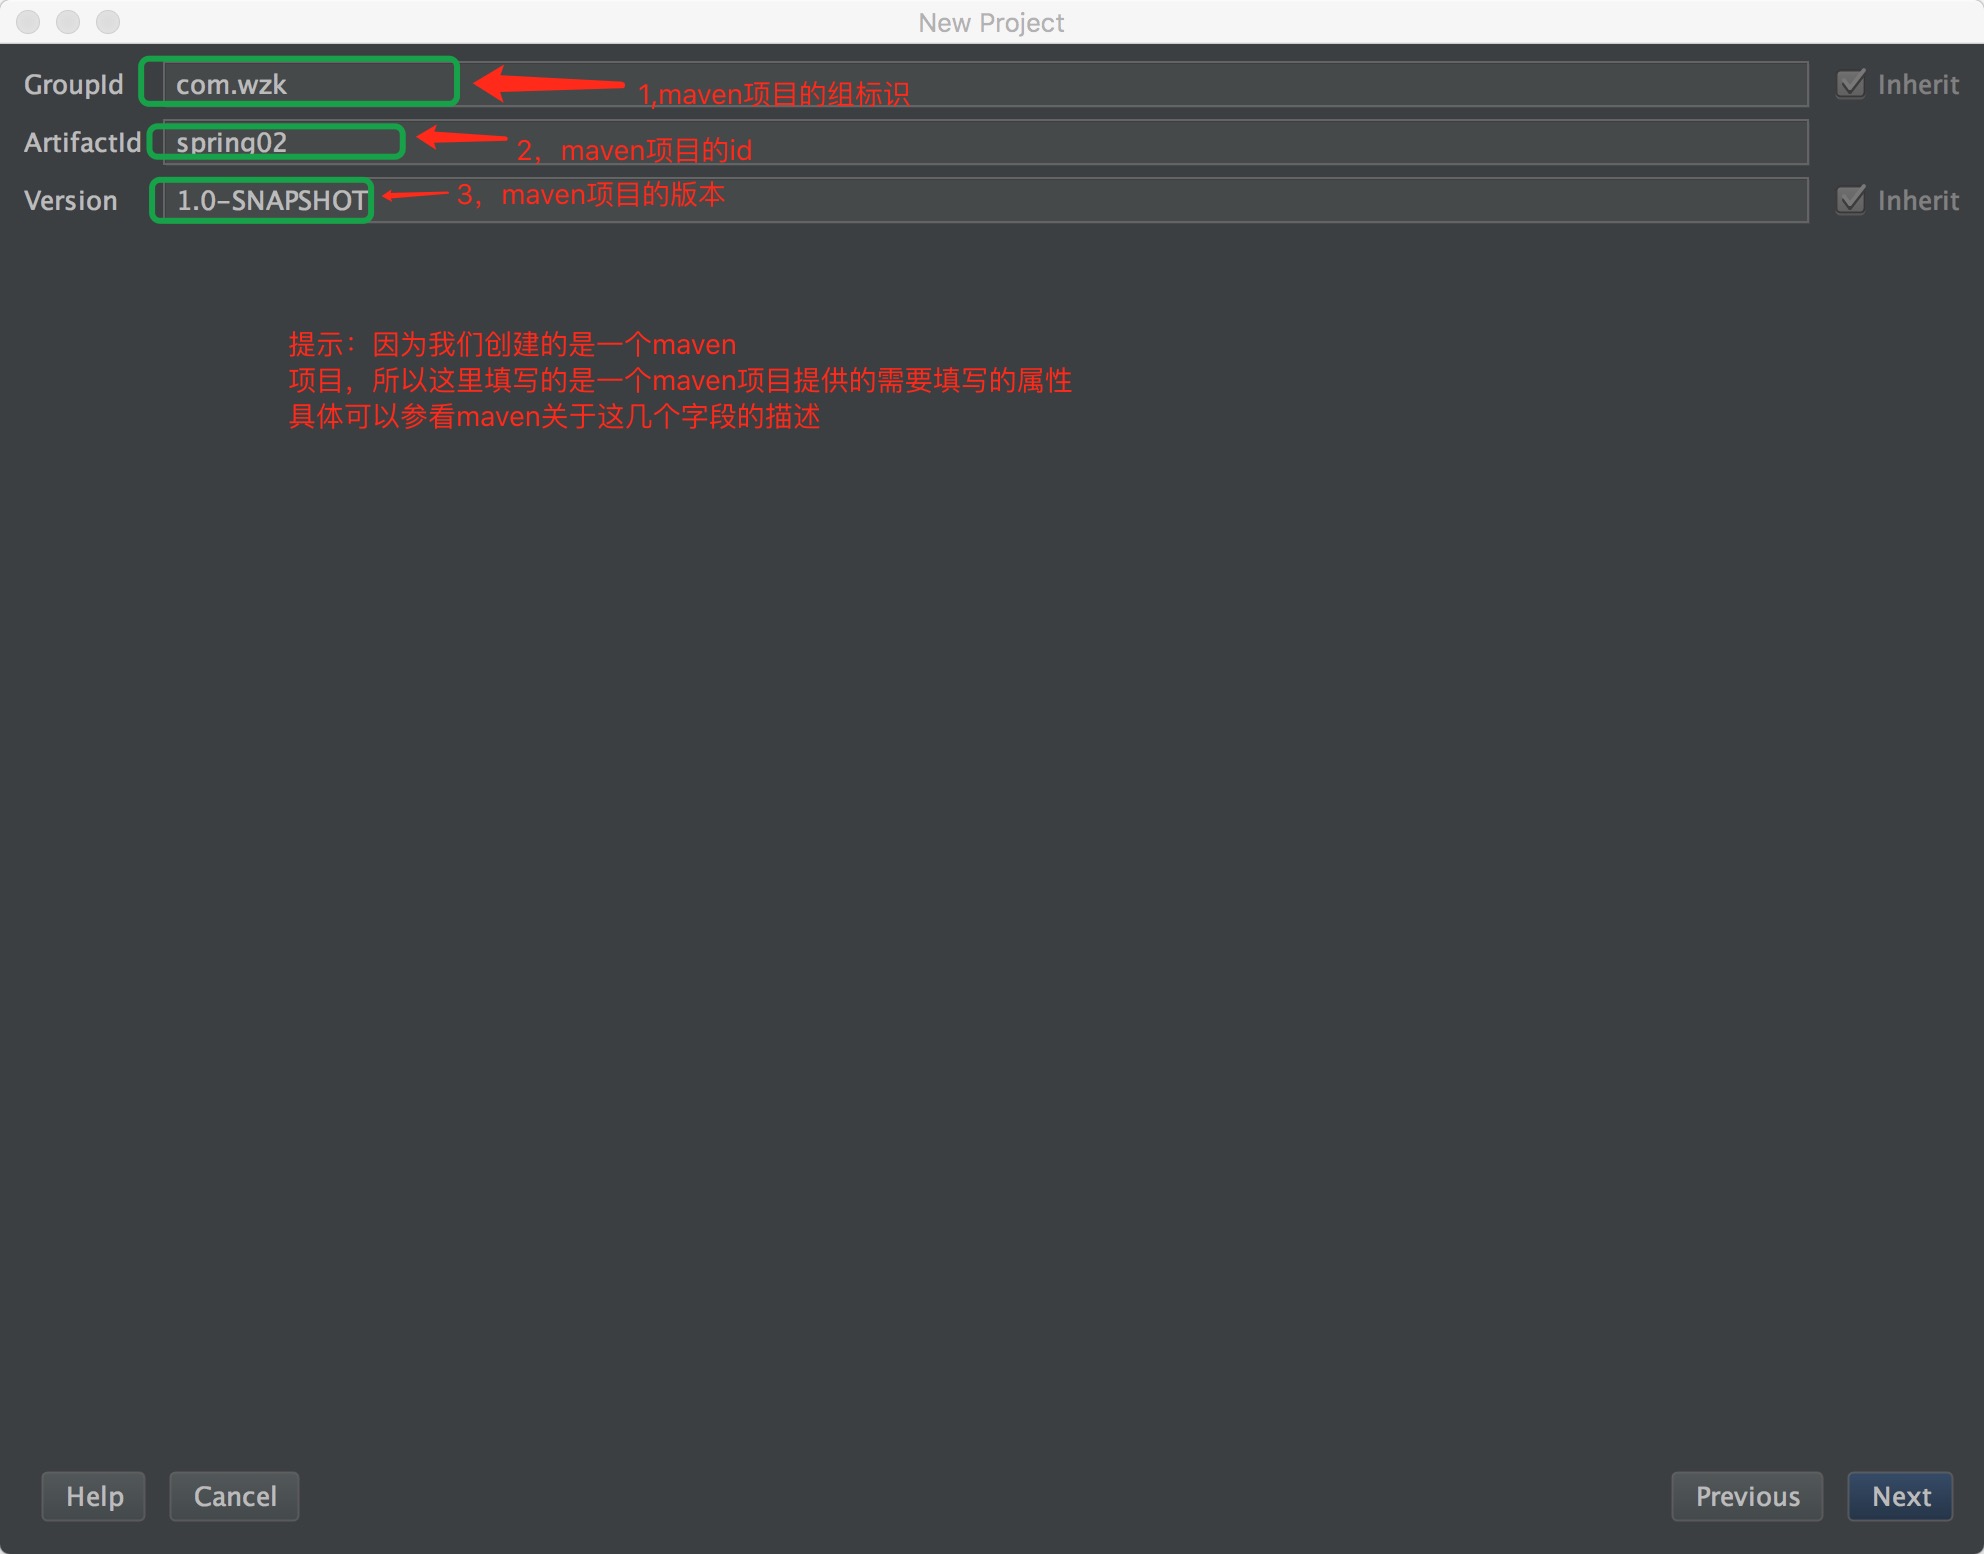
点击next
这一步填写项目的名称和存储的路径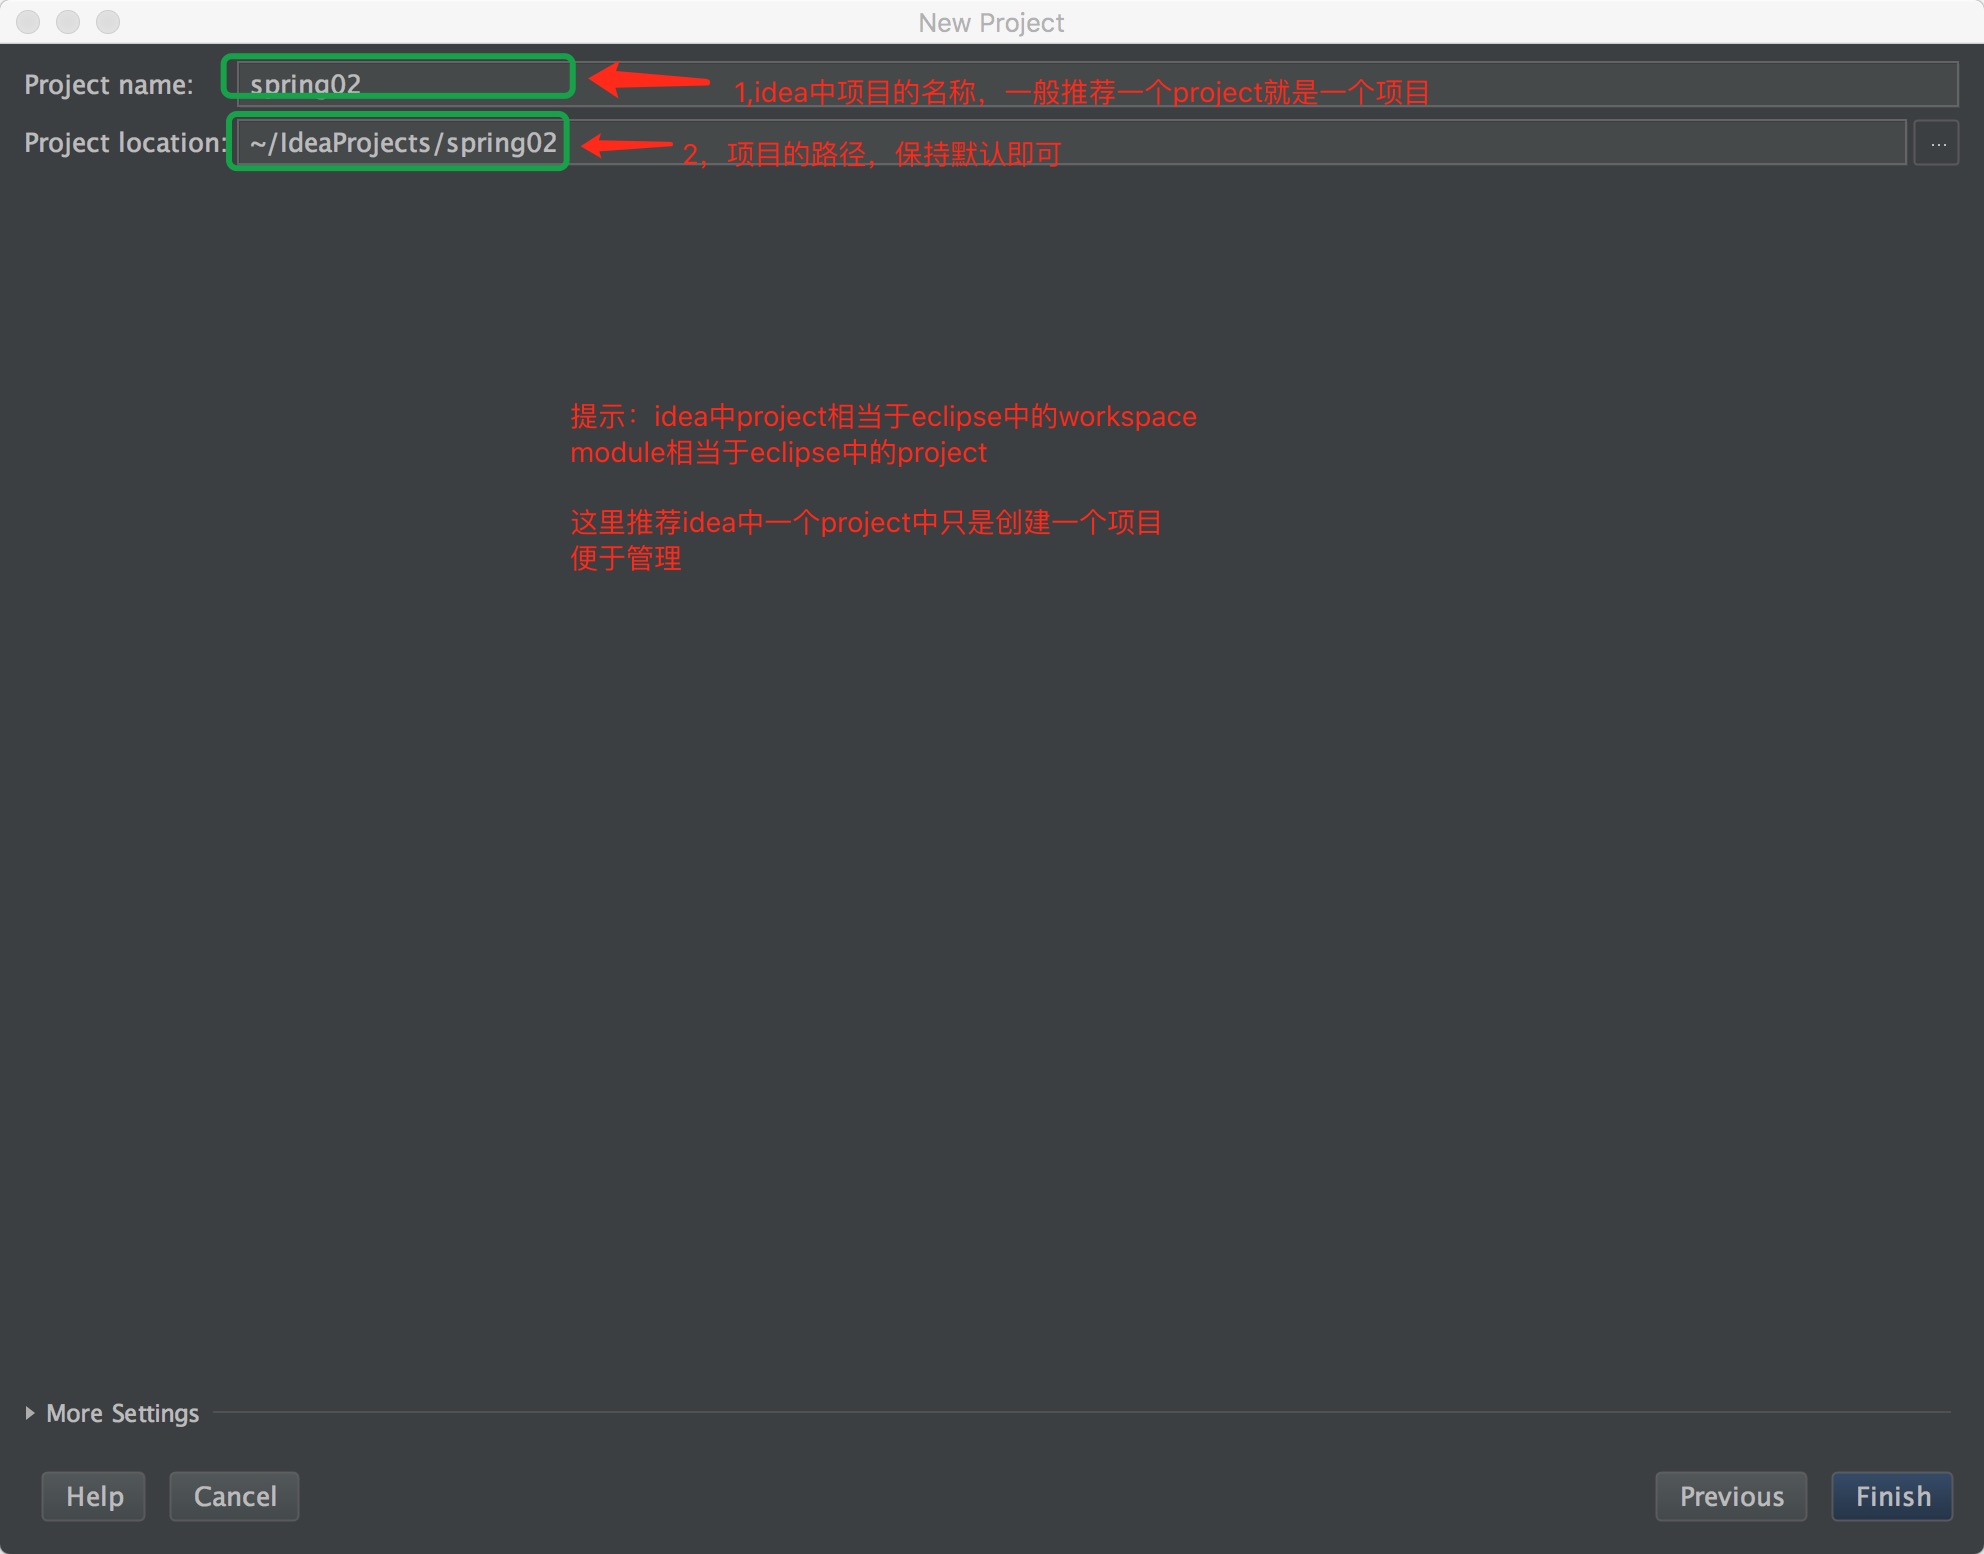
点击finish创建成功
到这一步一个简单的maven工程就创建完成了。
二、添加springboot支持
pom.xml文件中增加配置1
2
3
4
5
6
7
8
9
10
11
12
13
14
15
16
17
18
19
20
21
22
23
24
25
26
27
28
29
30
31
32
33
34
35
36
37
38
39
40
41
42<parent>
<groupId>org.springframework.boot</groupId>
<artifactId>spring-boot-starter-parent</artifactId>
<version>1.5.8.RELEASE</version>
<relativePath/> <!-- lookup parent from repository -->
</parent>
<properties>
<project.build.sourceEncoding>UTF-8</project.build.sourceEncoding>
<project.reporting.outputEncoding>UTF-8</project.reporting.outputEncoding>
<java.version>1.8</java.version>
</properties>
<dependencies>
<dependency>
<groupId>org.springframework.boot</groupId>
<artifactId>spring-boot-starter-web</artifactId>
</dependency>
<dependency>
<groupId>org.springframework.boot</groupId>
<artifactId>spring-boot-starter-test</artifactId>
<scope>test</scope>
</dependency>
<dependency>
<groupId>org.springframework.boot</groupId>
<artifactId>spring-boot-devtools</artifactId>
<optional>true</optional>
</dependency>
</dependencies>
<build>
<plugins>
<plugin>
<groupId>org.springframework.boot</groupId>
<artifactId>spring-boot-maven-plugin</artifactId>
<configuration>
<fork>true</fork>
</configuration>
</plugin>
</plugins>
</build>
由于最终要打包成jar格式所以pom.xml中还需增加配置1
2
3
4<groupId>com.wzk</groupId>
<artifactId>spring02</artifactId>
<version>1.0-SNAPSHOT</version>
<packaging>jar</packaging>
注意:
三、编写测试代码
创建类如下,SpringBoot的启动类,如果不做任何配置,默认启动的容器是tomcat1
2
3
4
5
6
7
8
9
10
11
12
13package com.wzk.ms;
import org.springframework.boot.SpringApplication;
import org.springframework.boot.autoconfigure.SpringBootApplication;
public class SpringbootApplication {
public static void main(String[] args) {
SpringApplication.run(SpringbootApplication.class, args);
}
}
再写一个自己的controller类,输入经典的helloworld1
2
3
4
5
6
7
8
9
10
11
12
13
14
15package com.wzk.ms;
import org.springframework.web.bind.annotation.RequestMapping;
import org.springframework.web.bind.annotation.RestController;
public class HelloWorldController {
("/hello")
public String index() {
String test = "Hello";
String test1 = " world";
String returnStr = test + test1;
return returnStr;
}
}
四、启动测试
- SpringbootApplication是一个含有main方法的java程序,所以直接运行
- 浏览器输入http://localhost:8080/hello
因为默认是tomcat所以端口默认8080,返回Hello world.
五、配置
修改springboot的配置很简单,直接修改resource下的application.properties文件即可。
如修改访问端口为8081,添加配置
server.port=8081
tomcat的其他配置可以参考
server.port=80811
2
3
4
5
6
7
8
9
10
11
12
13#server.address= # bind to a specific NIC
#server.session-timeout= # session timeout in seconds
#the context path, defaults to '/'
#server.context-path=/spring-boot
#server.servlet-path= # the servlet path, defaults to '/'
#server.tomcat.access-log-pattern= # log pattern of the access log
#server.tomcat.access-log-enabled=false # is access logging enabled
#server.tomcat.protocol-header=x-forwarded-proto # ssl forward headers
#server.tomcat.remote-ip-header=x-forwarded-for
#server.tomcat.basedir=/tmp # base dir (usually not needed, defaults to tmp)
#server.tomcat.background-processor-delay=30; # in seconds
#server.tomcat.max-threads = 0 # number of threads in protocol handler
#server.tomcat.uri-encoding = UTF-8 # character encoding to use for URL decoding
六、打包成jar
打包成可运行的jar
intelliJ打开命令行,运行mvn clean package即可
默认输出到target目录下,然后输入java -jar xxx.jar即可启动
关闭命令行窗口即关闭了容器

